Week Four: Biscuits- Harry
Biscuit Week: Part Three
HARRY

Harry... sigh... oh, Harry. So much love for Harry, and how his bakes are all about his family and love and also, to a slightly lesser extent, how much I love the way British things are so like and so unlike American things... like "biscuits" versus "cookies" and how the fake BBC people are up in arms about Hobnobs being "oat biscuits" but apparently have no issue with Toll House cookies being called Toll House?
And on that note, I'm going to start with the Toll House cookies.
Toll House Cookies
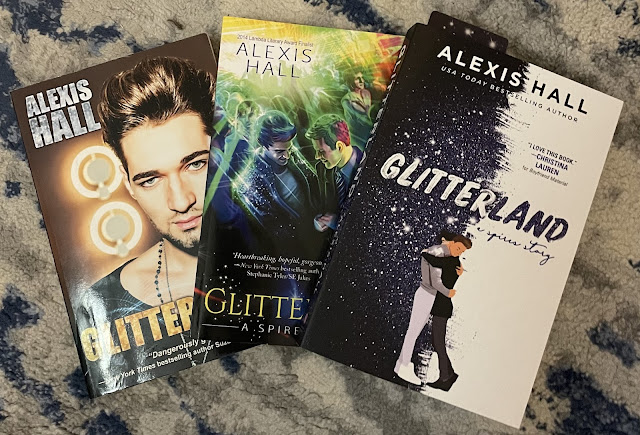
I can't call these Harry's because I actually bought Nestle Toll House chips for this, even though usually I buy generic grocery store chocolate chips, specifically because Harry calls them Toll House cookies and I baked them from the recipe off the wrapper. (Also, if you're interested, in the background of the picture below you can see my binder of Rosaline Palmer recipes with the little handmade chart I did of what to make when and for whom because I'm that kind of nerd.)

But before I get into that I have to say, that Toll House cookies are a thing I could make in my sleep. I have made this recipe every which way. These were the cookies that got me baking... when I was in high school I used to bake insane quantities of these throughout the year, but especially for my own birthday. I would bake milk chocolate, dark chocolate, white chocolate with dried cranberries, butterscotch, etc., etc., etc. and put them in tins and bring them to school in giant shopping bags and all day I'd give away cookies so that everyone would celebrate my birthday. I did not enjoy high school, overall, but I loved giving out cookies. Some people got so excited when I would bake cookies that I started making those people their own little baggies with an assortment so they wouldn't have to choose which cookies they wanted. Not people I was particularly friendly with on any other day of the year, mind you, just people I knew because it was a small town and a small school so you knew pretty much everyone, but these people would be so excited that I loved being able to pass them their own special ziplock of cookies.
Anyway, as I set about to make Harry's cookies, I realized it has been years since I made Toll House cookies cuz now I usually more likely to go along the lines of boozy bakes or garden herbs or other new or inventive or different takes, so this was a surprisingly delightful experience. Unlike the party rings or hobnobs, which I'd never even heard of, these were my childhood served back to me and then served to friends, neighbors, and coworkers which was weirdly reminiscent of high school in a surprisingly un-horrible way, and that was... I don't know.... nostalgic in a good way? Dare I say... fun?
I'm including the recipe in the only way a Toll House recipe should be included... on the wrapper (or the "cookbook" distributed by my elementary school one year which has the Toll House recipe, which is what I used to use in my parents' kitchen... but since y'all are unlikely to have access to *that* I'll give you a snapshot of the proper one.)

And the only thing I did differently was chill the dough, which was mostly due to timing but also because I've always been told cookies are better when you chill the dough, which makes lovely, fluffy, pillowy cookies. Which is fine, if that's what you're into, but generally I actually prefer these made with melted butter and not chilled which makes them flatter and chewier, and I prefer mine without nuts. But whatever, I went traditional here and they're, of course, delicious because they're Toll House cookies and they're *always* delicious.

Hobnobs
As I said, I'd never heard of hobnobs before. I used this recipe. I wish I could remember why I picked this one, but I don't. They turned out lovely though.
Ingredients:
- 125g tablespoons unsalted butter
- 80g cup brown sugar
- 2 tablespoons golden syrup
- 100g oats
- 100g whole wheat flour
- ½ teaspoon baking soda
- ½ teaspoon baking powder
- 1 teaspoon sea salt (the recipe says 1/2 to 1, to taste. I like a good pinch of salt in my baked goods so I recommend going with the full teaspoon)
- 100g chocolate (my Canadian friend, who has actually heard of and had hobnobs before, stopped me from nearly using semisweet chocolate because the recipe doesn't specify and that's my default, but she assured me that it should be milk chocolate and so I did a very last minute swap and used milk chocolate)
- 30g unsalted butter
- OPTIONAL 1-2 tbs of heavy cream (this wasn't in the recipe, and wasn't needed when I used the semisweet chocolate, but the milk chocolate seized up with the butter and needed some heavy cream to be spreadable)
Instructions:
- Preheat oven to 350F and line cookie sheet (or sheets) with parchment paper
- With a hand or stand mixer cream the butter and the brown sugar until pale, fluffy and smooth.
- Add the golden syrup and beat until it's incorporated
- On a low speed, mix in the oats, flour, baking soda, baking powder and salt
- Once the dry and wet ingredients are evenly combined bring the dough together into a ball, wrap with cling wrap and refrigerate for 15-20 minutes
- Roll the dough into small balls about the size of a tablespoon and flatten on the tray until they are about 2 inches in diameter. Be sure to leave a bit of room between the cookies for spreading
- Bake for 10-12 minutes, until golden brown, then allow to cool on the trays
- Melt the chocolate and butter together in a heatproof bowl set over a pot of simmering water or in a double boiler (that's what I used) or the microwave (doable but always a bit risky because burning chocolate is a thing you can't come back from)
- Spoon a healthy spoonful (the recipe said a teaspoon, I think that might be a bit light) of chocolate onto the top of each cookie and spread out evenly using the back of a spoon
- Once the chocolate has slightly set swirl your spoon across the chocolate working your way down the cookie in the shape of a figure eight (according to the recipe "This will create that beautiful classic hobnob look!" I tried it. I don't know if it's classic because, again, never seen/had/heard of them)
- Allow to set before enjoying/dunking into tea (if you add heavy cream, you'll probably need to set them in the fridge, which will ruin the glorious glossy shine, but it will set)

They were delicious and very well-received by the aforementioned Canadian who had actually had hobnobs before. In fact, they were her favorite of all the biscuits I made for biscuit week. (They weren't my favorite. I'm partial to the thyme honey biscuits from the prior post, but I did really like them.)
Party Rings
Like the Hobnobs, I'd never heard of, seen, or eaten a party ring before, so I picked a recipe from the internet for some reason at the time I picked it, but your guess is as good as mine for why I went with this one.
Ingredients:
- 8 oz good quality salted butter, softened
- 4 oz sugar
- 10 oz good quality, sifted, all-purpose flour
- 14 oz confectioner’s (powdered) sugar (the recipe says to sift, which normally you need to do with powdered sugar, but since you're adding to water it really isn't necessary as it will all dissolve)
- Purple (or blue and red), orange (or red and yellow), and pink (or red) food coloring
- Preheat oven to 350F and line a baking sheet or two with parchment paper or silicone mats
- Cream the butter and sugar until light and fluffy
- Add the flour and mix until a dough forms
- Bring the dough together on a flour dusted counter
- Chill the dough (the recipe didn't call for this, but I always think it's easier to roll it if you chill it, at least for a bit)
- Roll out to about 1/4" thick
- Cut the dough- the recipe called for a "party rings cutter" which I do not own, and while I am not opposed to buying specialty baking products by any means, I just used a water glass and it worked fine
- Cut center holes- again, the recipe called for the party rings cutter, I used the wrong end of a piping tip- then place on a baking tray with a spatula (VERY CAREFULLY, they will be wobbly and lose their perfect ring shape)
- Bake for 8-10 minutes
- Remove from oven and allow to cool completely on a rack

Luckily, like with Alain's cookies, I didn't think to halve the recipe, so I had enough dough to salvage and make the dozen for the picture.
Instructions (continued):
- Make the icing using the confectioner's sugar and just enough water to make a runny consistency- if a biscuit is dipped into the icing, a little will drip off, but won't all run off
- Divide the icing into four bowls: leave one white, color the other three pale purple, light pink and pale orange
- Dip some of the homemade party rings biscuits and place back on the rack. Before the icing sets, take another color of icing and pull lines across the top from a teaspoon or knife or toothpick (I used a toothpick, and I did all my lines in white on colored cookies, because I thought that would be prettiest)
- Next, take a skewer or toothpick and make lines across the icing lines you just made
- Repeat with the rest of the homemade party rings biscuits with the other colors
- Let them harden then eat and enjoy!

No one is going to praise my feathering as rather delicate or anything but clumsy, or rustic, or a bit of a mess, but honestly, they got better as I went on, and they turned out better than my last attempt at feathering so I'll take it as a win.
This is it for the biscuits I'm baking. I know others were referenced, but I decided not to do Claudia's sad Oreo-esque biscuits (though I do love Oreos), nor to look into Nora's rationing era biscuits (though they sound fascinating) because really, nine batches seemed sufficient... for now, at least.
The hobnobs were perfect!
ReplyDelete